AccuTracking Installation Guide: Nextel Motorola iDEN Phones
Note: AccuTracking requires a Nextel Data Access Plan or Southern LINC Java Access Plan.This guide is for Nextel customers only. For other carriers, use a USB data cable to load the AccuTracking software to the phone. Check if your phone is compatible here.
This guide is for regular Nextel phones (phones with monthly bill) only. For Nextel boost mobile phones (pre-paid phones), the only way to install AccuTracking is to use a USB data cable and Motorola iDEN Open Java Application Loader.
1. Install AccuTracking on Motorola iDEN phones
2. Configure Cell Phone Software
4. Monitoring phones from Google Earth
5. Monitoring phones from Microsoft MapPoint
1. Install AccuTracking on Motorola iDEN phones
1.1). Sign up at http://www.accutracking.com and login, then go to "Account" > "Download". Download AccuTracking installation file for your iDEN phone. If you phone model is not listed there, it's not supported. Save the downloaded AccuTracking.zip file to a folder on your local PC. Then unzip the AccuTracking.zip to a temporary folder (See here for how to unzip files), you'll see the "AccuTracking.jad" and a "AccuTracking.jar" file (you won't see file extensions if your Windows Explorer is configured to hide the file extension).
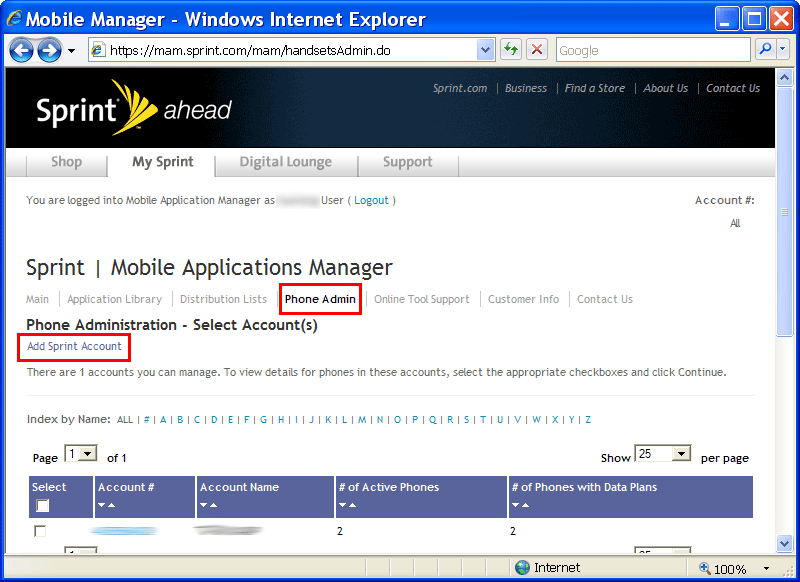
1.2). Go to Sprint Mobile Account Manager and login (register first if you don't have an account there. It's free). Then click "Phone Admin" > "Add Sprint Account" and follow the instructions to add your Sprint account to MAM.
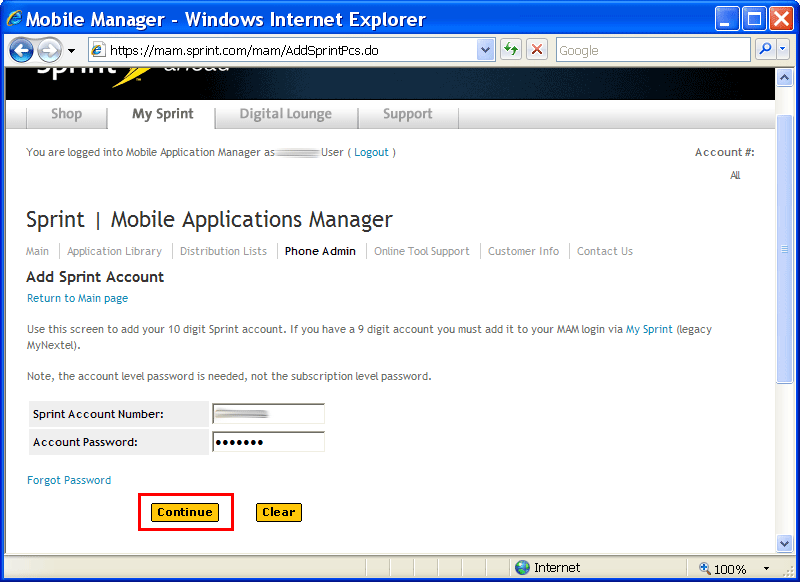
Enter your Sprint Account Number and Password:
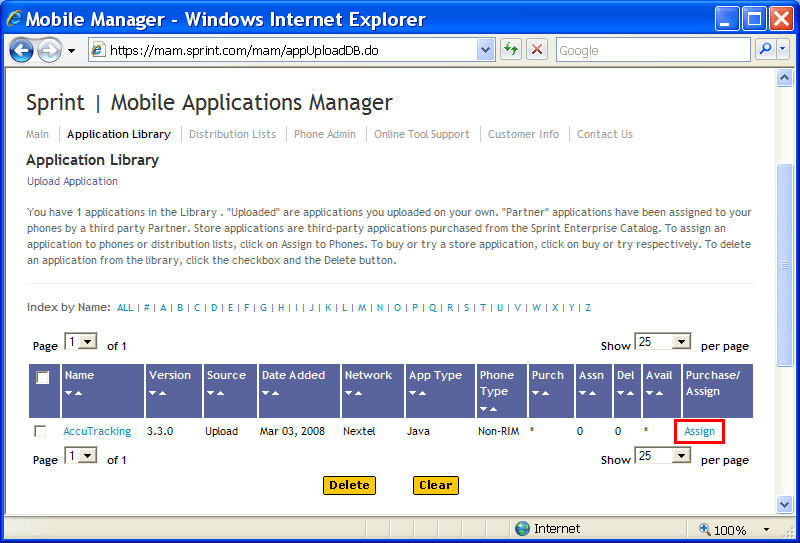
1.3). Click "Application library" then click "Upload Application".

1.4). On the next page select "Nextel" and "Non-RIM" then click "Next" button.

1.5). On the next page browse to the JAD and JAR files you just saved on your PC then click open.

1.6). On the next page, when it asks for the phone version, do the following on your phone:
(How to Find Your Phone's Software Version)
From the idle screen, press #, *, “Menu”, Right Arrow quickly.
Scroll down to "Unit Info".
Press the key under 'View' or the 'OK' nav button, depending on phone model.
Scroll down to 'Software'.
Press the key under 'Select' or the 'OK' Nav button.
The software version is listed first and normally starts with 'R', followed by a string of alpha/digits in the Rxx.xx.xx format.
On the Nextel Mobile Account Manager webpage, check the version that matches your phone version.Click "Next".

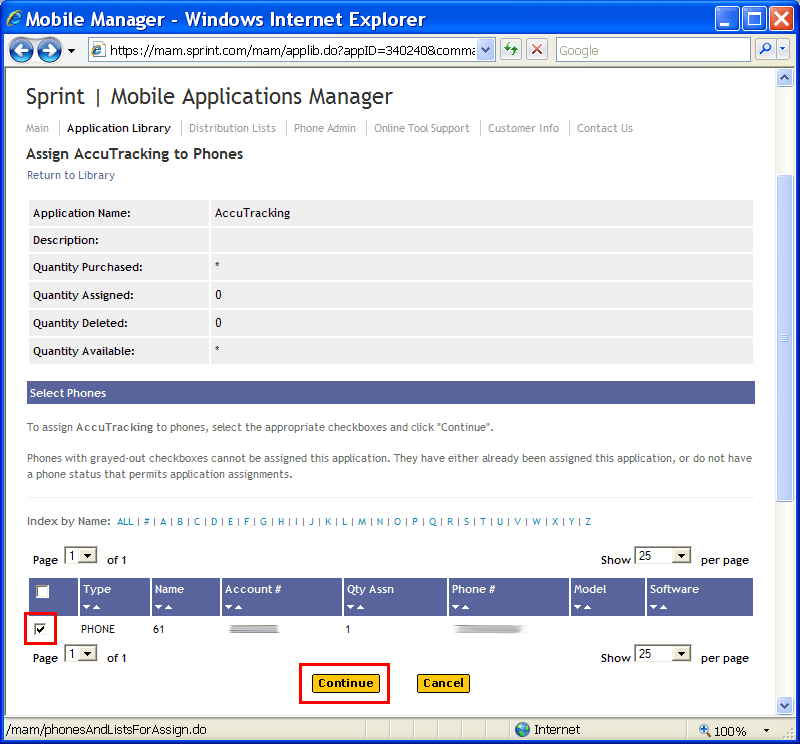
1.7). Click "Assign", then check the check box to the left of your phone number. Click "continue", then follow the screen to complete the phone assignment.

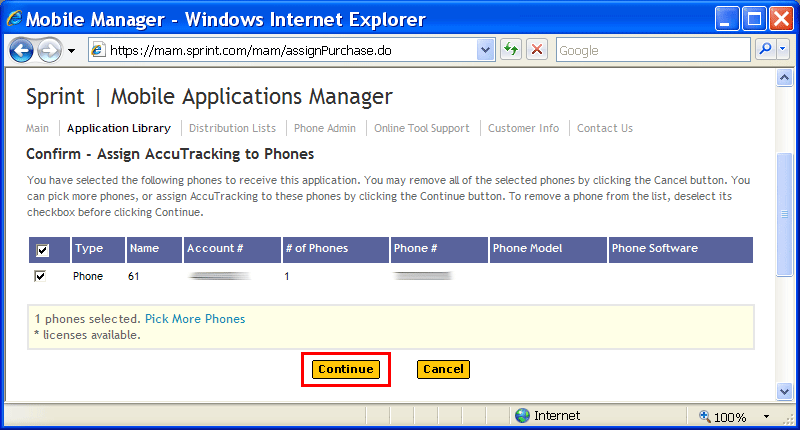

1.8). Now on your phone press the menu button, select "GPS"->"Privacy"->"Unrestricted". This will allow Java programs to access the GPS chipset.
1.9). Press the menu button, Select "Java Apps"->"Download Apps"->"RUN". Select "New Purchases". Highlight "AccuTracking" then "GET IT".
1.10). Go to your main "Menu"-> "Java Apps"->"AccuTracking"->"INSTALL"->"DONE".
1.11). Now you can select "AccuTracking" and press "RUN". Now you can go to step 2.1) below.
1.12). To access the main menu, on the AccuTracking screen, press the menu key (the key with the popup menu icon) on the phone keypad, you will see a list of menu items. To quit AccuTracking, select "Exit".
2. Configure Cell Phone Software
2.1). When running for the first time, the program will ask you to provide a Tracker ID. The tracker ID is obtained from the following steps:
2.2). Go to http://www.accutracking.com and login into your account, on "Manage Units" page, choose an easy to remember nick name for your phone, click "Generate Tracker ID" button. An ID will be generated for you.
2.3). Start AccuTracking on the phone. From the AccuTracking main screen, press the "menu" key on the phone keypad (the key with the popup menu icon), you'll see a list of menu items. Choose "Setup...", then move the cursor to tracker ID field (on most phone models: press menu button, you will see a list of input methods: Alpha/Word/Symbols/Numeric/Languages. Select "Numeric"), enter the tracker ID just generated and press "OK". Use "*" key as the delete key.
2.4). To access the main menu, on the AccuTracking screen, press the menu key (the key with the popup menu icon) on the phone keypad, you will see a list of menu items. To quit AccuTracking, select "Exit".
2.5). Some basic operations:
- Select "Virtual compass" from main menu for a compass.
- "Run in backgrd" command will send the application to background while still running.
- "Setup" command will bring up the option screen to set the sending interval, Hot GPS, Smart Sending preferences (see FAQ for more details).
- "Exit" will terminate the AccuTracking application.
3. Online Tracking
3.1). With the AccuTracking application running on your phone, go to an open air place and wait a few minutes until it says 'Latitude Longitude Speed Heading Altitude' and the status line shows "Sent" with a timestamp. Your position, speed and heading data has now been sent to the server and will be sent periodically.
If you see the error message on the screen reads "Cannot connect", you don't have the right data plan from your phone carrier. See the troubleshooting section below.
3.2). Log into http://www.accutracking.com and click "Tracking". You will see the locations and history of your phone.
4. (Optional) Monitor phones from Google Earth
Please see here for how to track your phone in Google Earth.
5. (Optional) Monitor phones from Microsoft MapPoint
If you already have Microsoft MapPoint software version 2004 or later installed, you can monitor the phone locations from Microsoft MapPoint on your PC. Please download the MapPoint Add-in from your "Account > Download" page and follow the AccuTracking MapPoint Add-in Help to install and use it.
Please see our knownledgebase page for troubleshooting.